Sunday, November 2, 2014

V Star 650 Jockey Shift Pictures

Here are a couple of shots. They're not the best, but they'll give you an idea of what I've been working on. I didn't mention in my previous post that I also moved the license plate away from the clamp on the swing arm. I made a new brace that secures using the final drive bolts. With the shifter  located at the front of the swing arm, I decided to move the license plate back a tad. This pic shows the bulk of what I've done. In it you can see the mirrors, and shifter, as well as the risers mention in one of my earlier entries.


Clutch brace for foot control


The horn and signal switch are just out of sight under the seat
in front of the shifter

Starter button and headlight switch ( It's is a flat rocker switch located in the 
battery cover down and to the left  of the start button )


Saturday, November 1, 2014

V Star 650 Jockey Shift and a Few Other Changes


The latest addition to my V Star includes a jockey shift with a foot clutch, and several other minor little changes. I have been contemplating the shifter change for quite some time, but the idea was never brought to fruition. However, recently while piddling around in the shop, I started working out placement ideas for the shifter. Since I wanted an actual jockey shift handle, it would need to be located just behind me. Using one of the holes from the abandoned passenger peg mounts, and one from the rear plastic engine cover, I came up with a plan. Working from that area, I could bend the shifter to match the curve of the swing arm, and have it come up just to the rear and beside me. For this location, constructing a longer linkage was required. I used the OEM right hand threaded linkage end for the front, but flipped it around facing rearward, and a left handed one for the shifter end. The linkage was threaded accordingly. It is about ¼ longer than I would like, so I may pull it off, cut a few more threads, and shave off that tid bit of excess. Also, it’s not quite a straight shot back, and currently rest on top of the side stand mount. I may work with that later to get a better fit. For the actual shifter, I used a manual bender to add a bit of a curve to a 1/2” round bar and an offset at the top to get around the frame. The shifter looked a little plain at the bottom, so I made a small sickle blade just for a little extra aesthetic appeal. Staying with that concept, I picked up a skull shifter knob from Chromed Hog Accessories on E bay  It came with a self threading rubber grommet in the bottom to hold the knob in place. I cut 5/16 threads on the shifter, and threaded the knob on. However, I didn’t feel confident that I wouldn't eventually pull it loose. I ended up drilling a hole through the lower part of the skull, and tapped a matching hole in the shifter rod. I now have it firmly secured with a small M6 x1.00 bolt. The clutch is operated by the former foot shift control. I made a small extension that bolts on to attach the cable. At this point, I’m still trying to think of some ingenious nifty idea for a clutch cable. Currently, I’m using a piece of wire that is twisted back on it self to keep it in place. It’s not permanent, but it will suffice until I can replace it. Swapping out the shifter however, created a domino effect for several other small changes. I completely removed the controls off the bars, and relocated them elsewhere on the bike. The signals and horn are located just under the frame next to the hand shifter, and the high/lo switch is now in the front of the battery cover. The previous location for the starter button by my left foot was not exactly ideal now that the shifter was a clutch pedal. So, I likewise moved it to the right side of the bike. I made a small mount, and bolted it just under the rear corner of the tank much like the choke is on the left side. Last but not least, since that side of the bar was empty with the exception of the grip, I had no where to mount the mirror. I picked up an inexpensive set of mirror mounts, painted them black of course, reversed the sides, flipped them upside down, and changed out both mirrors. Now, the mirrors hang under the bars upside down. I’ve seen this done a time or two on apes, liked the look, and decided to do the same on my bike. That’s it for now. I planned on getting a few pictures up by Halloween since my bike exhibits a dark theme, but I didn’t make it. A day late and a dollar short is the story of my life. It’s a little too cold, and a lot too windy right now for a comfortable bike ride with photos. I’ll try and get a few posted soon. Until then, ride safe. 

Sunday, July 27, 2014

How to install a Bobber Rear Fender on the V Star 650


With so many riders exploring the realm of bobber building, here are directions on “how to install a Bobber Fender kit”. My bike was a guinea pig for this project but has now resumed its former state with the full fender. Our platform bobber kit for this instructional can be found on Ebay.


Parts list:
Galvanized bobber fender with pre-installed bolts, and washers
Front brace for fender
Left and Right round rod strut
Inside strut mount (2)
Outside strut mount (2)
¼ x 1” hex head bolt (4)
¼ x 1.5” hex head bolt (2)
Flat washers (6)
Lock washers (6)
Acorn nuts (6)
Wing Nuts(2)
Notched spacers (2)


Install directions:

1)  Compare parts list with what was received. Ensure you have everything you’ll need to assemble the kit.
      a) Please read instructions completely, make sure you understand each step.
2)  Support, and secure your V Star. This is required later for removal of the shock bolt.
3)  Remove all stock-OEM seat, fender, struts, and lighting. The instructions for this can be found on-line in pdf format.
4)  Remove the rear shock bolt, and feed the front tab of the fender brace under the seat support, placing the lower tabs of the brace securely on the outside of shock mount. Re-install the shock bolt and nut, but do not tighten at this point.
5)  Center the fender on the wheel, and align the two bolts in the front of the fender with the holes found on the front fender brace. Once each bolt is through the brace, secure loosely using a washer, lock washer, and acorn nut.


6)   Each strut mount side consists of a metal outside brace, a metal inside brace, a ¼ x 1" bolt, flat washer, lock washer, and acorn nut. Push the ¼ bolt through the small rectangle brace first. This will be on the inside of the swing arm facing out. Place the larger brace on the outside with the tab for the strut at the back. Place the washer, lock washer and acorn nut on the bolt. Then tighten the bolt to hold everything in place.
7)   The struts included are left, and right specific. Ensure the struts match the appropriate side before installation. The left side has an offset with the longer end at the top. The right side is where you will use the straight strut. It will only fit one way. If it doesn’t fit, you have it upside down. Using the appropriate strut for each side, align the hole in the tab with those in the lower part of the strut. Secure each with a 1/4”x1” bolt, flat washer, lock washer and acorn nut. Fasten each strut accordingly, and loosely tighten the nut. Hold on to the strut until you are ready to align with the top hole in the fender. Working one side at a time is best.

8)  Align the top hole in the strut with those found in the fender. From the back side of the fender, insert the ¼”x 1.5” bolt into the pre-drilled hole. Place the small notched spacer on the ¼” bolt between the fender and strut. The larger spacer is for the straight strut. Secure the strut in place from the outward facing side with the wing nut provided. Repeat this step for the other strut.
9)  Visually inspect the fender, ensuring all steps are complete. At this point, re-align the fender with the wheel, and adjust accordingly ensuring fitment on your V Star. Tighten and secure the front brace at the shock mount, and fender, as well as all points of contact on the struts for both fender and swing arm.

10)  Visually inspect the fender once again, and adjust if necessary. I recommend using blue Loctite, or some form of thread lock on all bolts when tightening for the final time.
11)   Enjoy the new bobber fender you’ve just installed, and ride safe.

Saturday, April 12, 2014

D'OH!


Do you ever have one of those moments when you feel like Homer Simpson? Well, this was one of them. My last modification was painting, and adding new risers…sounds easy enough right? Every thing went as planned with one slight exception. When I installed the newly painted risers, I just couldn't help but put a little more torque on the cap than I should have. I was impatient, and didn't let the paint fully cure, and ended up with a slight blemish on the lower edge. It wasn't that bad, and hardly noticeable. However, every time I sat on the bike, I always caught myself looking right at it. The only thing to do was repaint it. No big deal! I pulled it off, wet sanded the entire cap, ensuring that it was smooth as silk, and started on with a new coat of paint. The temps were in the 70’s with relatively low humidity, and the paint went on perfectly. I let it sit for a couple of days just to be safe. I was pleased with the results, until I screwed the cap back on the riser, and then it hit me. The risers were painted “satin” black to match the bars, and looked great as far as I was concerned. The nice new paint on the riser cap also looked great, and was a fine coat of “gloss” black. I mention before about naming the bike “Bad Omen”? I think I’m helping it live up to the name. Looks like I’ll be getting those pictures of the newest addition to my V Star at a later date. Until next time, and after I re-paint the riser cap AGAIN, ride safe.

Saturday, April 5, 2014

Faint of Heart Chrome Addicts...Look Away!

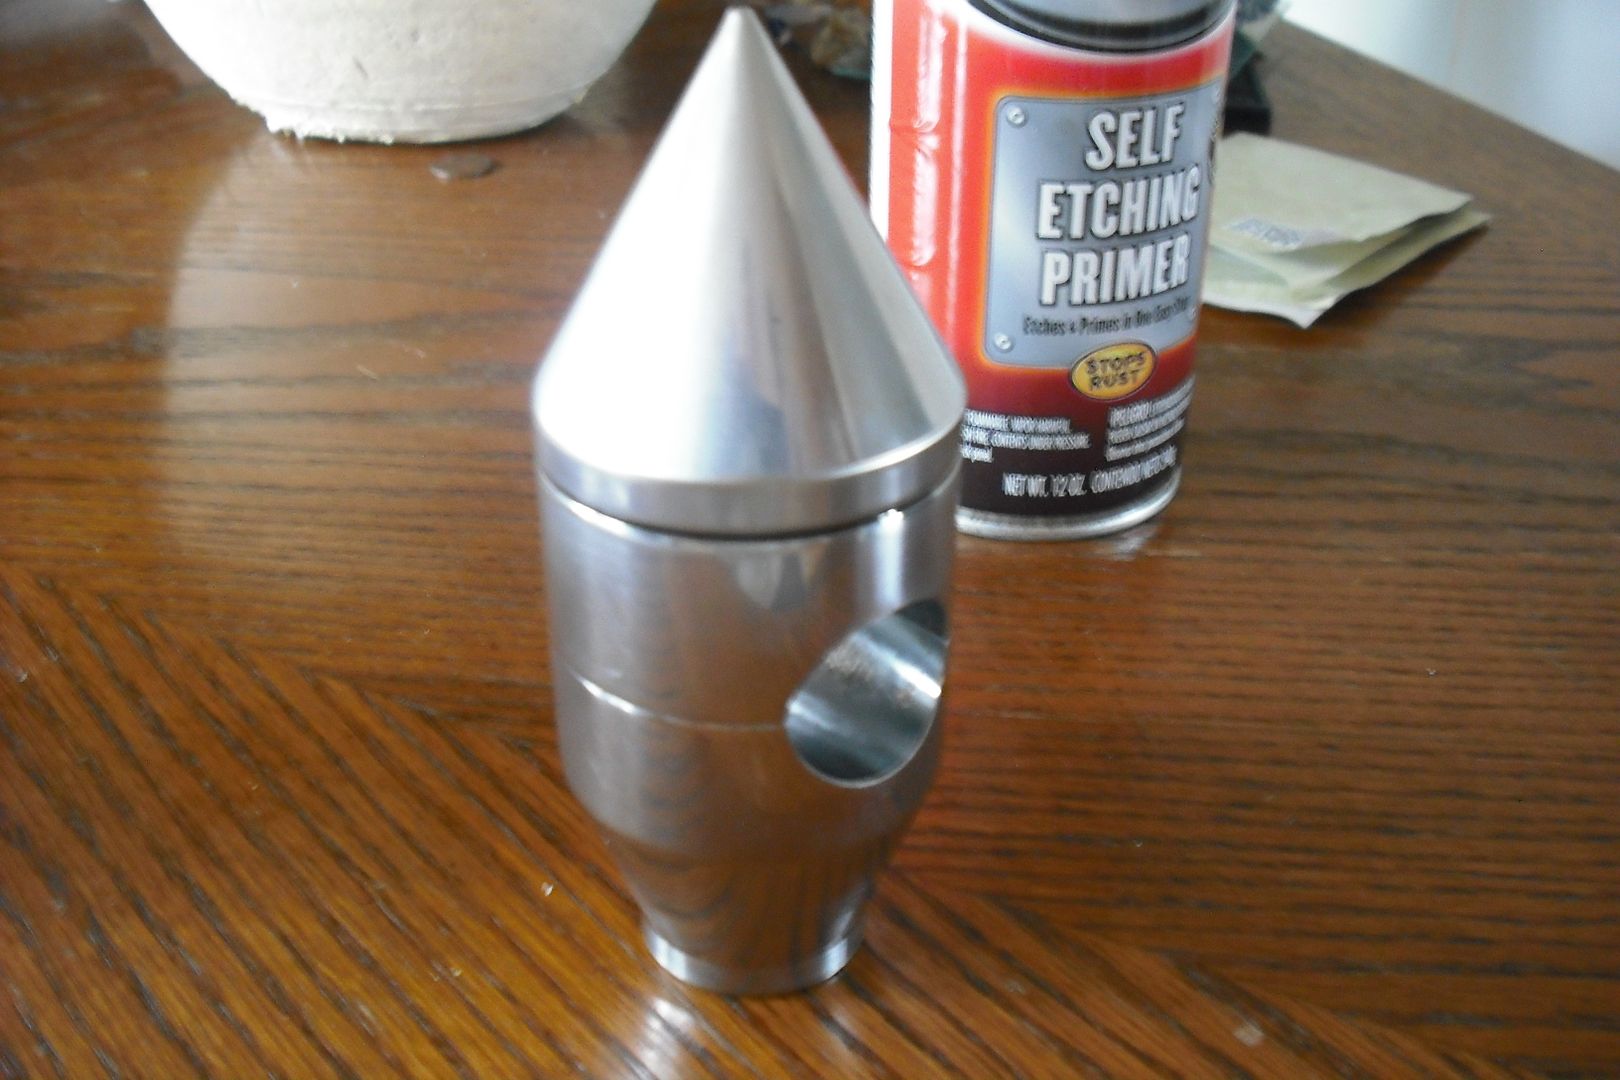
Once again, I have ruined perfectly good chrome. I found a deal on Ebay for a set of chrome risers that I couldn’t resist. Naturally, my slight aversion to chrome dictates that I had to paint them black. At first, I considered leaving them chrome and simply replace a few of the smaller accessories with chrome to accent the risers. I came to my senses though, and painted them black to go with the existing theme of the bike. When adding the apes last year I contemplated the idea of spiked risers versus the flat top design. I already had the spiked lower fork bullets, and previously trimmed the rock guards into spikes, so the idea for spiked risers made sense. However, I didn’t want to go overboard with that look on the front end, and have it stand out or look odd when compared to the rest of my VStar. Every time I walked by the bike though, the thought of spiked risers entered my mind. Finally, I decided to bite the bullet when I found a slightly used set from a seller EBay. When they arrived however, they were in much better shape than I presumed. As much as it pains me to say, I really hated sanding them down. Hence, the reason I almost left them chrome. Doing so however, I would have wanted to add in more chrome to go with them and I just didn’t see me going through with that idea. The dark theme has remained consistent through the years, and I wouldn’t want to change it now. I plan to get a picture of the bike with the new look as soon as the rain let's up. Well, that’s it for now. Until my next mod, or tid bit of news, ride safe.
Sanded Chrome

Saturday, December 21, 2013

21st Annual Outback Riders Toy Run 2013

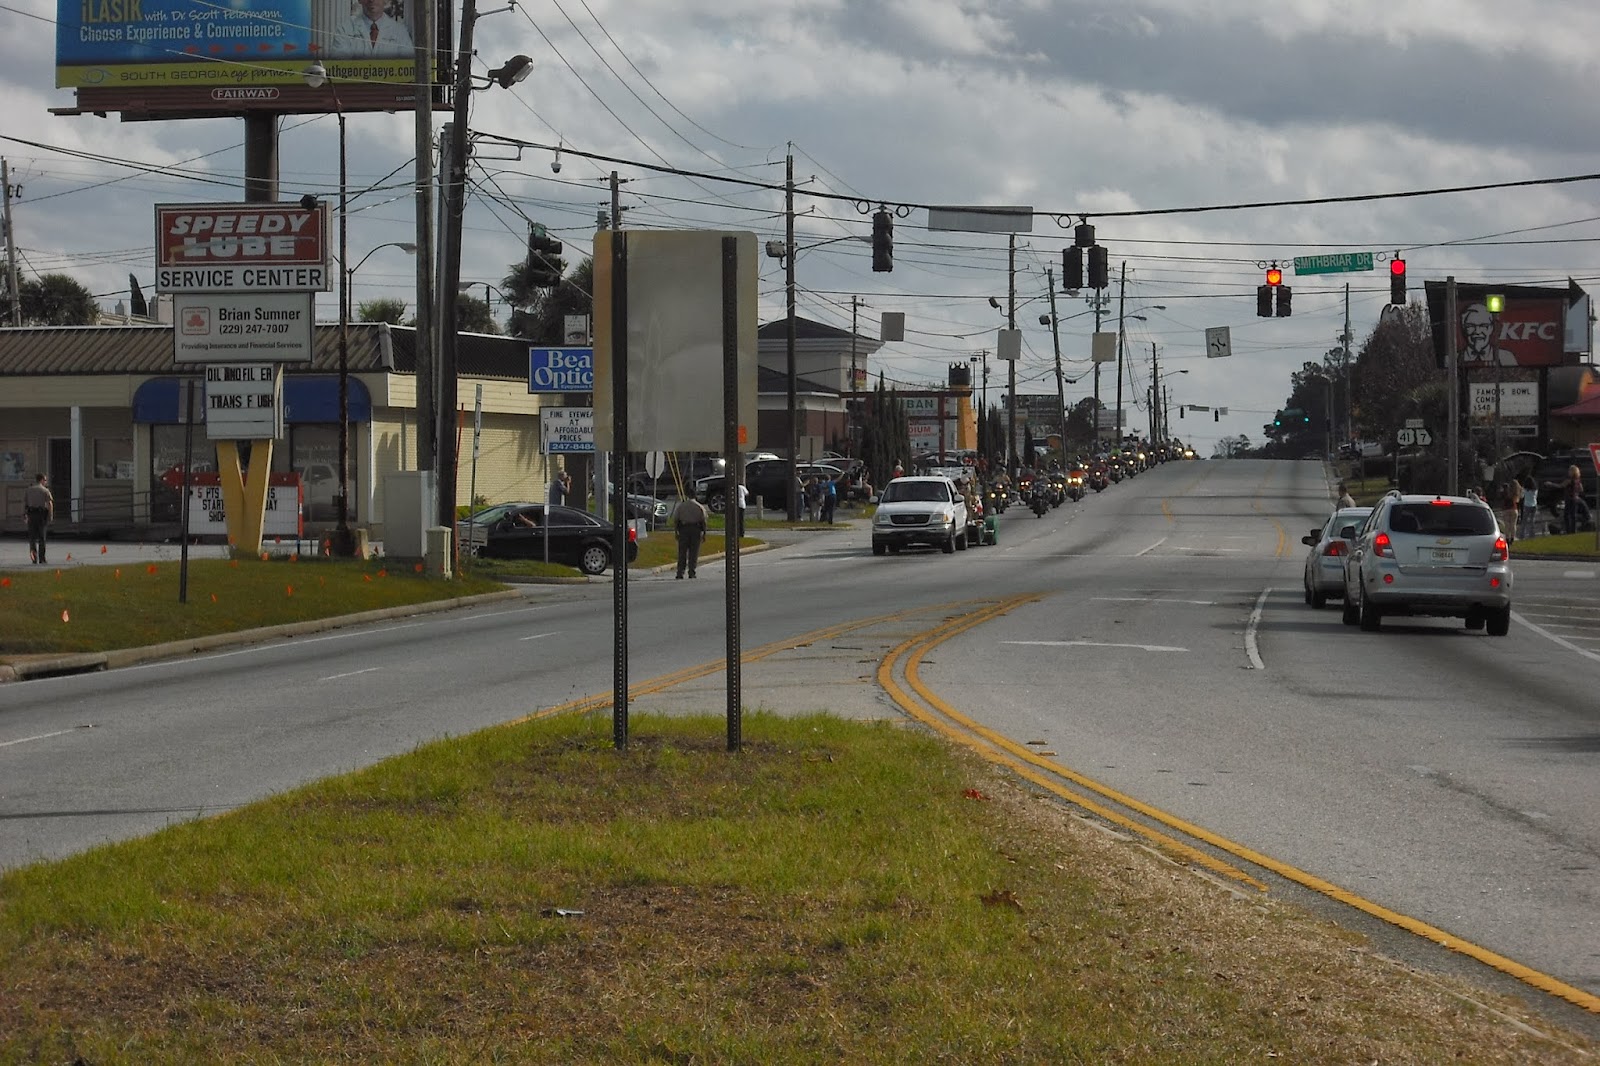
Eighty degree weather with only a hint of dark clouds above brought forth yet another remarkable turnout for the Outback Riders toy run. With bikes as far as the eye can see, participants once again came together for the children in this community. This year marks the 21st annual ride that began with comparatively modest numbers. Since the first year, this annual event has grown into one of the largest such rides here in the state of Georgia. The Outback Riders in collaboration with the Salvation Army, and Empty Stocking Fund open their hearts this time of year in expressing the true gift of giving. The generosity of all those involved benefit less fortunate children that would otherwise sadly, do without. This mutual act of kindness brings forth men, and women, from all walks of life, for miles around with one goal in mind, a Merry Christmas. So, to all of the brothers and sisters of the Outback Riders, and every one else that made this possible once again, thank you, have a very Merry Christmas, and as always… ride safe.
First Bikes top the hill


Santa

The Vstar ( I just had to put one in of my bike)


Sunday, November 17, 2013

Apehangers, Mirrors, and Risers on the VStar

I took the time today to snap another picture with better visibility of the new bars, mirrors, and risers. It has been too rainy as of late to get much else done. I plan to tackle the headlight tint as soon as I can, and will most likely add a fresh coat of paint to the headlight. I doubt I will embark on any major new endeavours before the first of the year. I'd like to keep things simple to prevent any more down time. Hopefully, I will be able to attend the Annual Outback Riders Toy Ride again this year,and will post pics of it just as I did last year. Until my next update...ride safe.

Sunday, November 10, 2013

VStar with Apes...at last!

Well, with a little bit of modifying, and a few choice words, I’m done… for now. After all of the recent tinkering, I finally had the chance today to take the bike for a quick ride around the block. I would say getting accustomed to the apes is going to take more than it did when I added the extra 6 degrees to the front end. I guess the added length increases leverage, making any response to turning the bike much more sensitive. Currently my VStar has a total of 16 inches of rise, in contrast to the seemingly miniscule 4.5 that I previously had. However, the throttle cable that created so much turmoil is almost too long. I ordered the length based on the stock set up offering about 8 inches of rise where as these bars have 13.5 with 2.5 inch risers. Therefore, adding 7 inches to the throttle cable seemed a logical choice. Though it is a tad longer than needed, I’m not going to complain so long as it works. The clutch cable, on the other hand, is a bit tight when turning. I did not order the clutch cable at the same time as the throttle because I have considered adding a jockey/suicide shifter. I’m still mulling it over though, and I don’t think I want anymore changes until I’ve grown accustomed to the new bar height. For appearance sake, the addition of the new bars seems to diminish the effect of the added rake. The bike looks to have resumed the stance more reminiscent that of a stock VStar. With that said, I still believe I will enjoy the change. One a side note, while rewiring the frame lights for a couple of new additions, I managed to break…more like pull apart, the strand of lights under the rear fender. In the future those will need to be replaced, and at the same time I plan to try and add some to shine on the front wheel. The addition I previously mentioned is in the form of a couple of small strands of blue, one behind the hyper charger, and one inside the HD horn cover. The idea here is to create more of an ominous eerie glow. The blue strands almost outshine the purple, but I’m satisfied with the overall results. Now, I just have to complete it on the front, and back wheel for the full effect. I also purchase a small piece of purple tint to add on the lense of the headlight, all in good time though. For now, I’m just happy to have my bike up, and running again. I will update with a few more pictures once I’ve added the headlight tint later. Until then…ride safe.

Sunday, November 3, 2013

Barnett.... Never Again!!!

I will not endorse, or advocate the use of any Barnett products. What started out a very pleasant endeavor has become a nightmare. The first cable that was ordered was supposedly lost in transit. I fully understand that excuse as I too have had packages lost due to the postal service. After the duration of several weeks wait time, and my previous disappointments concerning this cable, my frustration however was hard to quell. Although, after being reassured a second cable would be made and expedited to me, I started to feel better. I was told to expect the cable the following Monday. That day came and went. I contacted them and was given a second apology, and another reassurance that the cable would be sent. Due to my schedule I was unable to call for another couple of weeks, but still had not received the cable. When I contacted them, I was told my order didn’t go through because of insufficient funds on my card. That was impossible as they had already been paid in full several weeks prior to this call. Turns out, there was an attempt to charge my card for a second cable. What????? I had not received the first cable, so when they attempted to charge my card again, the funds were already gone. Thankfully, I have a special card set up for all internet transactions that I only add enough money to for a particular purchase. Therefore, I was saved from being charged twice for a cable that I still did not have. I was told to call back the following week so that I could speak with someone about my situation. Fine! I contacted them once more, and asked for a refund. By this time I am fuming, knowing that I passed up an earlier opportunity on Ebay for full cable set that was roughly the cost of the single cable at Barnett. I was willing to hold out because I really wanted to have the Harley end on the cable that would work with the Harley throttle housing. Well after asking for a refund, I was once again assured that the cable was made, sitting on her desk, and would be sent at once. I was hopeful that this was finally going to be it. I was wrong. After another week the cable arrived, and it was not what I ordered, and had been waiting for. This was a VStar +7 cable but it did not have the HD elbow that I paid extra for. Another phone call to Barnett only provided more frustration. I was told there would be a shipping label emailed to me, and I could send that cable back for the alteration. The real kick in the teeth is when I realized that I was expected to pay the shipping charges. I currently have a call in to dispute this matter, but have not been called back as of yet. Here is where my frustrations boiled over in to madness. I decided I would try and make the best of it and work around their mistakes. I drilled out the Harley housing to accept a VStar cable, and have made a new retaining clip to hold the cable in. When I attempted to thread the barrel end into the throttle end of the grip I noticed the barrel on the end of the cable was misshapen. I tried anyway and was able to get barrel into the opening on the grip, however it will not spin freely allowing the cable to lie down inside the guide on the grip. Now, I know the grip is fine because I have already checked everything with the stock VStar cable and alls well. The barrel moves freely inside the end of the throttle sleeve allowing for proper operation. The Barnett barrel end will not move, and work the way it should. So now I’m left wondering, after the work I’ve done this afternoon, what is my next course of action. I think I’ll sleep on it, and make a decision in the morning. I will let you all know next week of the direction I plan to take at this point. Until then…ride safe.

Thursday, October 31, 2013

Halloween Vstar ?


Though I thought I would certainly have my VStar roadworthy by Halloween, I’m sad to report it’s not. After waiting patiently several months, I did receive the wrong cable earlier this week. I don’t even have words for my disappointment. So, I will present you with a few pictures of what I have thus far. The theme of the bike seemed appropriate for a Halloween reveal. I just don’t have the finality of completed bike pictures yet, or a ride. The mirrors actually had real spider webs that I thought I had wiped clean. I think I still see evidence of the previous occupant in the last picture.

Tuesday, September 17, 2013

Bad Omen?

I’m starting to think maybe this bar swap wasn’t such a good idea. It seems that a higher power is trying to send me a message. The cable that was made, and shipped has apparently been lost in transit. So, I’m left still waiting to get my bike on the road. I truly can’t say when that will be. At this point, I’m tempted to cancel the order,use that money to purchase some cheap bars, put things back like they were, and call this project done. As the old saying goes, hindsight is 20/20. If I would have only known then how this would turn out, I doubt I would have embarked on this little endeavor. I don’t know where I will go from here, but I’ll let you know soon what I decide. Until then…ride safe!

Monday, September 9, 2013

No cable yet!

I still have not received my cable, and therefore have no updates to share. I just wanted to add a short entry here for those of you that may be waiting to see the current changes. I have been assured the cable was in fact made, and has now shipped. To date, I have now been working on this project longer than anything else I’ve done with my VStar simply due to not having the appropriate cable. I have everything ready, just no cable. I did start the bike up to insure that the new starter switch worked well, and everything worked as planned. I promise I will update with pictures as soon as I can. Until then, ride safe…

Sunday, August 25, 2013

Mirror Deja vu

With all of the recent changes, I’ve decided it was about time to upgrade the mirrors as well. As you already know from reading through some of my first blog entries, the stock mirrors were one of the first items to go. The stockers were replaced with the teardrop style Arlen Ness Rad II mirrors. However, the new bars seemingly add a new aura to the bike, prompting this recent change. After mulling over several styles, and consulting with the wife and kids, presenting them with multiple choices, I was left to decide between the two top selections. Both mirrors resemble the Arlen Ness style tear drop, only with a little bit different twist. The choice I made reflects the overall “dark” theme of the bike, while complimenting the new bars. I’m so close to getting everything back together, I plan to post pictures of the mirrors along with the bars, risers, and some of the other odds and ends I’ve been working on, when it’s all complete. Until then, ride safe.

Saturday, August 17, 2013

Just a few Pictures

I've been doing a lot of talking without posting any pictures for you lately. Here are a few of the items I have been toying with. The picture shows the stock right side wire bundle with the kill switch by passed. I also have the new starterbutton, grips, and Harley Davidson throttle housing. Originally it was chrome, but we can't have that now can we. I used a little bit of rattle can paint I picked up from our local Lowe's store. I want to compliment them on their line of Valspar spray primer/paint combinations. This product lays down real smooth, and gives a nice clean finished coat of paint. I used the satin black to paint the throttle housing, and have now painted the foot switch mount that I made to add a unique way for starting my Vstar. It is pictured separately. I have it mounted on the bike now, and will give more details about it later. I may actually attempt to improve on the design later on after I determine if the foot placement for the current one will suffice. I still haven't taken any pics with the bars yet. It's really hard to picture the final look without the tank on the bike. I still have everything removed for better access when the time comes to work on the throttle cable. Well that's it for now, more to come later. Until then, ride safe.

Customer Service?

I’ve hit a slight snag, so the bar swap will take a little bit longer. I’ve had the bars, and risers installed for weeks now, as well as all of the extras I’ve been working on have been completed. The problem lies in one of our local bike shops here in Valdosta, Red-line Cycle Center. This was the place I counted on to make the throttle cable. I’ve been in contact with them throughout the duration of the previous month about this issue. I was assured it could be made, and was quoted a price. To make a long story short, after multiple calls, and several visits, and numerous request to have this completed, I am still without the cable. I have literally begged this guy to take my money, and make the cable I requested. The very one I was told he could make. To make matters worse, the original quote has grown with every visit. On Friday, the final straw was when it was suggested that I trailer my bike up there for him to look at. He has already been given the old and new throttle, the old cable, and I’ve told him explicitly what I needed, as well as the measurements. What possibly could the bike offer that I have not already covered? Fortunately, my wife has been doing most of my leg work, as I simply have not had the time to do so. This guy has proven he is incompetent thus far, and lacks the capacity to handle customers appropriately. He has not called back when he said he would, and was not at his shop when he claimed he would be. Did I mention he sent the throttle housing back to me with scratches in the paint, adding more work for me to repaint it? So, I refuse to go any further with this ridiculous little man that does not deserve to have a business license. I have however found a beacon of hope among all of the bad customer service I’ve encountered lately. I spoke with Colleen Barnett-Taylor, from Barnett Clutches and Cables, and have painlessly ordered the exact cable I needed. Though my communication with her was brief, she was very pleasant, extremely helpful, and I feel confident that this order will go well. So, at this time, and until I receive the cable, I have no further updates to share. Ride safe……

Monday, July 22, 2013

Ape Hanger Update

Well, this project is slowly coming to fruition. I have the bars and risers on the bike, but have removed all controls, cables and wiring. So far, my ever growing list of ideas is culminating into one big melting pot of work. I’m not saying I mind the work, but I do miss riding my bike. Here is what I have so far. I’ve ordered, and received new grips to replace the ones that became a casualty of removing the old bars. Previously, when installing the left side grip on the old set of dragbars, I used a tad of cheap epoxy to keep it in place. As it turns out, cheap epoxy holds much better than expected, and will stand up against most solvents, resulting in the removal of the grip with a dremel, large flat blade screwdriver, and a hammer. As you probably guessed, I had to buy new grips. Since I was content with the look of those, I simply ordered another set to replace them. Along with replacing the grips, I ordered a Harley Davidson single throttle cable housing, and a momentary waterproof starter switch. The plan here is to reduce as much bulk as possible from the bars. The HD housing is not only smaller, but it likewise eliminates the use of the saftey/push throttle cable. In addition to that, relocating the starter switch to elsewhere on the VStar should prove to clean up that side of the bars. I will most likely leave the left side as is. Currently, I have received about half of what I need to get this project complete. I will keep working at it little by little, and continue to update when I can. Ride safe…

Wednesday, July 17, 2013

What Makes the VStar Great?

The VStar is such a versatile bike, and relatively inexpensive to modify, providing the option of having a “new” bike anytime you take the notion to get creative. If you haven’t guessed yet, I’ve decided on a few changes again. It just hit out of the blue one day while perusing through the treasure trove of parts on Ebay. I found a deal on a new set of bars that I just couldn’t pass up. I’ve always liked the looks of apehangers, but didn’t like the price for the ones that I found most appealing to my unusual taste. Call it fate, or accident, but I found a set of 13”apes that I feel will be perfect for my bike. For this change, I didn’t want to go overboard, or too high, so I decided to swap out the risers as well. I found a 2.5 inch round black riser that will work well with the new bars, while not being too outlandishly tall. I’ve mounted the bars, and risers, but still have a couple of loose ends, literally. I’m addressing cable, brake, and wiring issues, and will hopefully find a resolve this week. I’m contemplating moving the start switch away from the bars to another place on the bike. For the rest of the wiring, I’ve removed the neck covers and un-wrapped the bulk of it from around the neck, providing a little more length, and enough for the bar/riser combo. I’m currently speaking with a local guy to have the cables, and possibly the brake line made here in town. Hopefully this will alleviate some of the extra cost from online shipping charges. I normally like to plan my modifications a little better than this, giving me plenty of time in advance to buy all of the extras that are needed. This time I’m working a little backward. In the end however, I think everything should come together nicely. I will keep you posted with progress, and pictures later. Until then…ride safe.

Monday, April 15, 2013

How to Change the Dust/Wiper Seal on Your Vstar 650

As you know, I recently replaced the dust seals, also know as wiper seals, on my VStar. Here is a quick run down of what to do should you face this same problem. I was a tad rushed during the job due to the great riding weather I was missing, so I didn’t take the time to document each step with pictures as I should have. At any rate, here is how to remove and replace the dust/wiper seals….


1) Raise and secure the bike, ensuring you have enough space, and support to remove the front wheel.

2) Loosen the pinch bolt that holds the axle in place, you will find this on the lower slider next to the axle.

3) Loosen and remove the speedometer cable from the speedometer drive gear unit located on the wheel.

4) Remove the axle, and slide the wheel and brake rotor assembly out and away from the forks. At this point, the speedometer unit can be removed from the wheel and placed in such a way as to not let dirt or debris get in the unit.

5) Loosen and remove the two bolts holding the brake caliper in place, and remove the caliper. For this step you can simply place the caliper on a box or stool, keeping the brake line attached, preventing having to bleed the brakes when re-attaching the line.

6) Working with one fork at a time, loosen the pinch bolts found at the back of the triple trees, one for the top, and one for the bottom.

7) The tube should slide right out. If not, gently nudge it from the top, while applying a little pressure from under the triple trees. This should remove the fork tube completely from the bike.

8) Use a small flat blade screwdriver, held laterally, to gently persuade the rubber dust seal up. You will not need to apply a lot of pressure here, and should not press the screwdriver down into the fork, or else you could damage the fork seal.

9) With the old dust seal removed, simply slide the new seal down the tube until it rests on top of the fork slider. You can make a round sleeve to slide around the tube and drive the seal in evenly, or carefully tap it down making sure not to damage the seal as you guide it in.

10) Repeat this for both fork dust seals.

11) Reverse steps 1-6, reinstalling the fork tubes, wheel, rotor, and brake caliper. For each, there are recommended torque specifications. In most cases, I generally just tighten the bolts and make sure everything is secure. The first time or two doing this job, I did use a torque wrench. As of late however, I have found it a tad unnecessary.

There you have it. It’s a simple fix, and will keep your VStar’s fork seals protected from any dirt and dust, preventing any damage that may otherwise occur. As mentioned previously, I have a couple of ideas that I’m still mulling over. With a little luck, some more brainstorming, and hopefully some time off to work on my VStar, and I’ll be back with another update. Until then…ride safe!