Sunday, November 2, 2014

V Star 650 Jockey Shift Pictures

Here are a couple of shots. They're not the best, but they'll give you an idea of what I've been working on. I didn't mention in my previous post that I also moved the license plate away from the clamp on the swing arm. I made a new brace that secures using the final drive bolts. With the shifter  located at the front of the swing arm, I decided to move the license plate back a tad. This pic shows the bulk of what I've done. In it you can see the mirrors, and shifter, as well as the risers mention in one of my earlier entries.


Clutch brace for foot control


The horn and signal switch are just out of sight under the seat
in front of the shifter

Starter button and headlight switch ( It's is a flat rocker switch located in the 
battery cover down and to the left  of the start button )


Saturday, November 1, 2014

V Star 650 Jockey Shift and a Few Other Changes


The latest addition to my V Star includes a jockey shift with a foot clutch, and several other minor little changes. I have been contemplating the shifter change for quite some time, but the idea was never brought to fruition. However, recently while piddling around in the shop, I started working out placement ideas for the shifter. Since I wanted an actual jockey shift handle, it would need to be located just behind me. Using one of the holes from the abandoned passenger peg mounts, and one from the rear plastic engine cover, I came up with a plan. Working from that area, I could bend the shifter to match the curve of the swing arm, and have it come up just to the rear and beside me. For this location, constructing a longer linkage was required. I used the OEM right hand threaded linkage end for the front, but flipped it around facing rearward, and a left handed one for the shifter end. The linkage was threaded accordingly. It is about ¼ longer than I would like, so I may pull it off, cut a few more threads, and shave off that tid bit of excess. Also, it’s not quite a straight shot back, and currently rest on top of the side stand mount. I may work with that later to get a better fit. For the actual shifter, I used a manual bender to add a bit of a curve to a 1/2” round bar and an offset at the top to get around the frame. The shifter looked a little plain at the bottom, so I made a small sickle blade just for a little extra aesthetic appeal. Staying with that concept, I picked up a skull shifter knob from Chromed Hog Accessories on E bay  It came with a self threading rubber grommet in the bottom to hold the knob in place. I cut 5/16 threads on the shifter, and threaded the knob on. However, I didn’t feel confident that I wouldn't eventually pull it loose. I ended up drilling a hole through the lower part of the skull, and tapped a matching hole in the shifter rod. I now have it firmly secured with a small M6 x1.00 bolt. The clutch is operated by the former foot shift control. I made a small extension that bolts on to attach the cable. At this point, I’m still trying to think of some ingenious nifty idea for a clutch cable. Currently, I’m using a piece of wire that is twisted back on it self to keep it in place. It’s not permanent, but it will suffice until I can replace it. Swapping out the shifter however, created a domino effect for several other small changes. I completely removed the controls off the bars, and relocated them elsewhere on the bike. The signals and horn are located just under the frame next to the hand shifter, and the high/lo switch is now in the front of the battery cover. The previous location for the starter button by my left foot was not exactly ideal now that the shifter was a clutch pedal. So, I likewise moved it to the right side of the bike. I made a small mount, and bolted it just under the rear corner of the tank much like the choke is on the left side. Last but not least, since that side of the bar was empty with the exception of the grip, I had no where to mount the mirror. I picked up an inexpensive set of mirror mounts, painted them black of course, reversed the sides, flipped them upside down, and changed out both mirrors. Now, the mirrors hang under the bars upside down. I’ve seen this done a time or two on apes, liked the look, and decided to do the same on my bike. That’s it for now. I planned on getting a few pictures up by Halloween since my bike exhibits a dark theme, but I didn’t make it. A day late and a dollar short is the story of my life. It’s a little too cold, and a lot too windy right now for a comfortable bike ride with photos. I’ll try and get a few posted soon. Until then, ride safe. 

Sunday, July 27, 2014

How to install a Bobber Rear Fender on the V Star 650


With so many riders exploring the realm of bobber building, here are directions on “how to install a Bobber Fender kit”. My bike was a guinea pig for this project but has now resumed its former state with the full fender. Our platform bobber kit for this instructional can be found on Ebay.


Parts list:
Galvanized bobber fender with pre-installed bolts, and washers
Front brace for fender
Left and Right round rod strut
Inside strut mount (2)
Outside strut mount (2)
¼ x 1” hex head bolt (4)
¼ x 1.5” hex head bolt (2)
Flat washers (6)
Lock washers (6)
Acorn nuts (6)
Wing Nuts(2)
Notched spacers (2)


Install directions:

1)  Compare parts list with what was received. Ensure you have everything you’ll need to assemble the kit.
      a) Please read instructions completely, make sure you understand each step.
2)  Support, and secure your V Star. This is required later for removal of the shock bolt.
3)  Remove all stock-OEM seat, fender, struts, and lighting. The instructions for this can be found on-line in pdf format.
4)  Remove the rear shock bolt, and feed the front tab of the fender brace under the seat support, placing the lower tabs of the brace securely on the outside of shock mount. Re-install the shock bolt and nut, but do not tighten at this point.
5)  Center the fender on the wheel, and align the two bolts in the front of the fender with the holes found on the front fender brace. Once each bolt is through the brace, secure loosely using a washer, lock washer, and acorn nut.


6)   Each strut mount side consists of a metal outside brace, a metal inside brace, a ¼ x 1" bolt, flat washer, lock washer, and acorn nut. Push the ¼ bolt through the small rectangle brace first. This will be on the inside of the swing arm facing out. Place the larger brace on the outside with the tab for the strut at the back. Place the washer, lock washer and acorn nut on the bolt. Then tighten the bolt to hold everything in place.
7)   The struts included are left, and right specific. Ensure the struts match the appropriate side before installation. The left side has an offset with the longer end at the top. The right side is where you will use the straight strut. It will only fit one way. If it doesn’t fit, you have it upside down. Using the appropriate strut for each side, align the hole in the tab with those in the lower part of the strut. Secure each with a 1/4”x1” bolt, flat washer, lock washer and acorn nut. Fasten each strut accordingly, and loosely tighten the nut. Hold on to the strut until you are ready to align with the top hole in the fender. Working one side at a time is best.

8)  Align the top hole in the strut with those found in the fender. From the back side of the fender, insert the ¼”x 1.5” bolt into the pre-drilled hole. Place the small notched spacer on the ¼” bolt between the fender and strut. The larger spacer is for the straight strut. Secure the strut in place from the outward facing side with the wing nut provided. Repeat this step for the other strut.
9)  Visually inspect the fender, ensuring all steps are complete. At this point, re-align the fender with the wheel, and adjust accordingly ensuring fitment on your V Star. Tighten and secure the front brace at the shock mount, and fender, as well as all points of contact on the struts for both fender and swing arm.

10)  Visually inspect the fender once again, and adjust if necessary. I recommend using blue Loctite, or some form of thread lock on all bolts when tightening for the final time.
11)   Enjoy the new bobber fender you’ve just installed, and ride safe.

Saturday, April 12, 2014

D'OH!


Do you ever have one of those moments when you feel like Homer Simpson? Well, this was one of them. My last modification was painting, and adding new risers…sounds easy enough right? Every thing went as planned with one slight exception. When I installed the newly painted risers, I just couldn't help but put a little more torque on the cap than I should have. I was impatient, and didn't let the paint fully cure, and ended up with a slight blemish on the lower edge. It wasn't that bad, and hardly noticeable. However, every time I sat on the bike, I always caught myself looking right at it. The only thing to do was repaint it. No big deal! I pulled it off, wet sanded the entire cap, ensuring that it was smooth as silk, and started on with a new coat of paint. The temps were in the 70’s with relatively low humidity, and the paint went on perfectly. I let it sit for a couple of days just to be safe. I was pleased with the results, until I screwed the cap back on the riser, and then it hit me. The risers were painted “satin” black to match the bars, and looked great as far as I was concerned. The nice new paint on the riser cap also looked great, and was a fine coat of “gloss” black. I mention before about naming the bike “Bad Omen”? I think I’m helping it live up to the name. Looks like I’ll be getting those pictures of the newest addition to my V Star at a later date. Until next time, and after I re-paint the riser cap AGAIN, ride safe.

Saturday, April 5, 2014

Faint of Heart Chrome Addicts...Look Away!

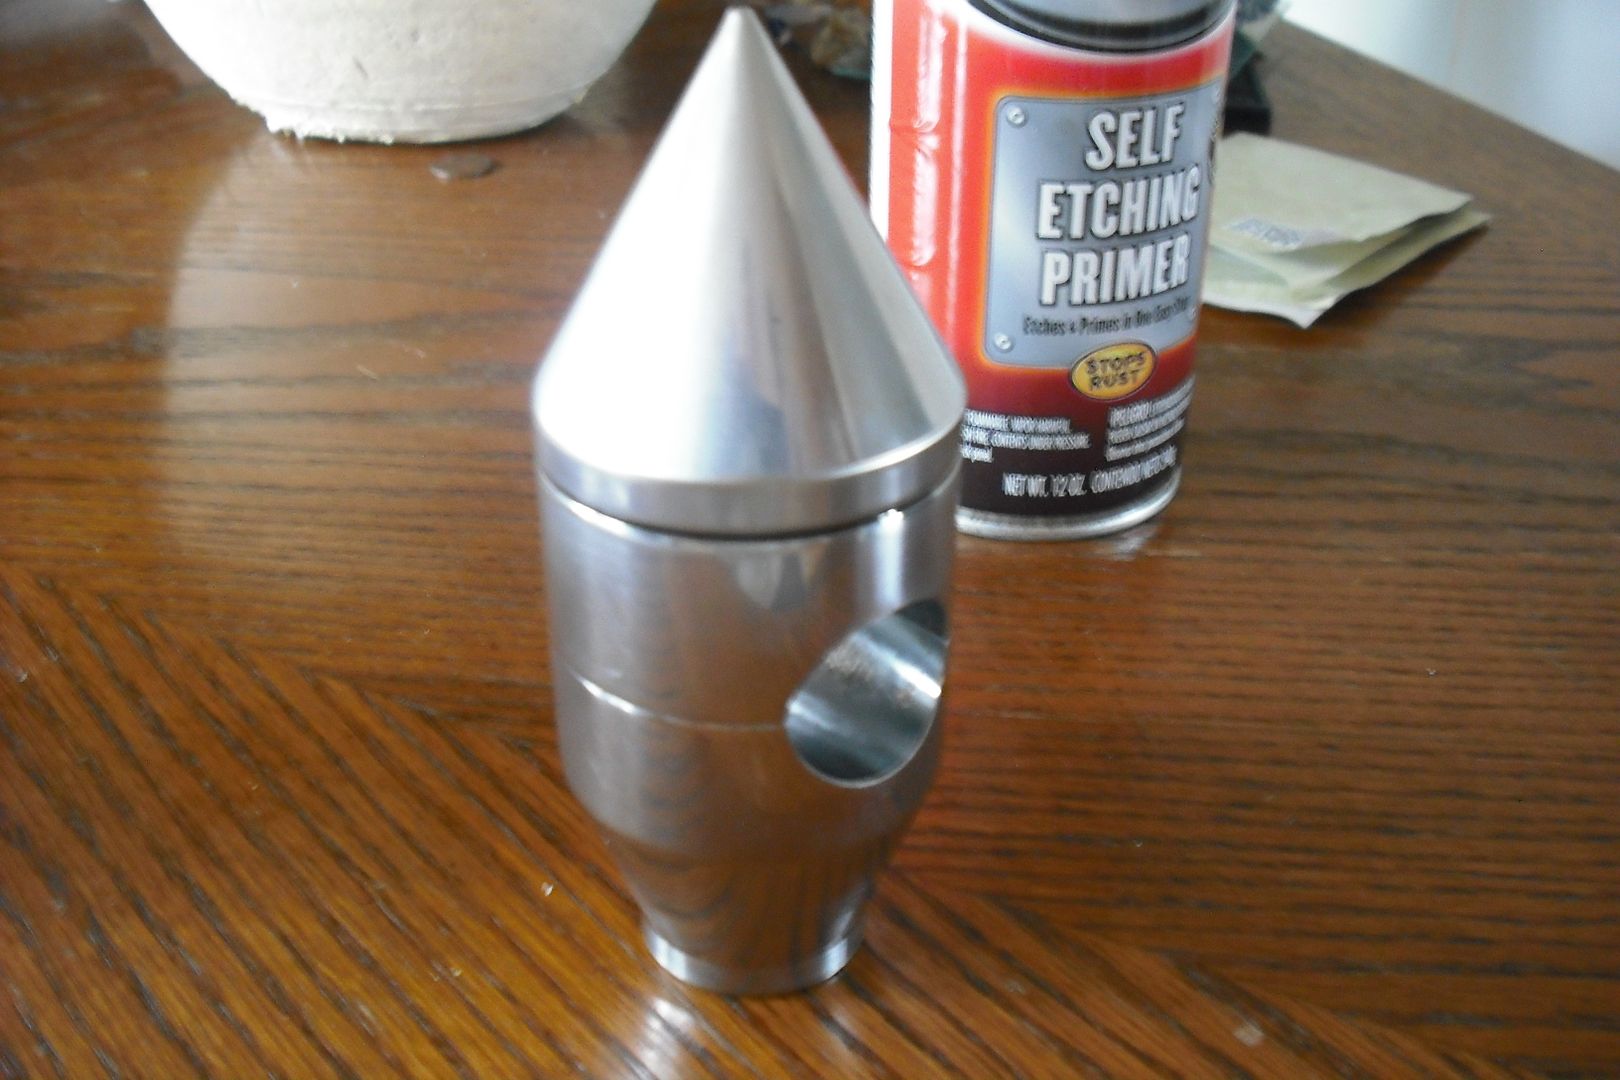
Once again, I have ruined perfectly good chrome. I found a deal on Ebay for a set of chrome risers that I couldn’t resist. Naturally, my slight aversion to chrome dictates that I had to paint them black. At first, I considered leaving them chrome and simply replace a few of the smaller accessories with chrome to accent the risers. I came to my senses though, and painted them black to go with the existing theme of the bike. When adding the apes last year I contemplated the idea of spiked risers versus the flat top design. I already had the spiked lower fork bullets, and previously trimmed the rock guards into spikes, so the idea for spiked risers made sense. However, I didn’t want to go overboard with that look on the front end, and have it stand out or look odd when compared to the rest of my VStar. Every time I walked by the bike though, the thought of spiked risers entered my mind. Finally, I decided to bite the bullet when I found a slightly used set from a seller EBay. When they arrived however, they were in much better shape than I presumed. As much as it pains me to say, I really hated sanding them down. Hence, the reason I almost left them chrome. Doing so however, I would have wanted to add in more chrome to go with them and I just didn’t see me going through with that idea. The dark theme has remained consistent through the years, and I wouldn’t want to change it now. I plan to get a picture of the bike with the new look as soon as the rain let's up. Well, that’s it for now. Until my next mod, or tid bit of news, ride safe.
Sanded Chrome

Saturday, December 21, 2013

21st Annual Outback Riders Toy Run 2013

Eighty degree weather with only a hint of dark clouds above brought forth yet another remarkable turnout for the Outback Riders toy run. With bikes as far as the eye can see, participants once again came together for the children in this community. This year marks the 21st annual ride that began with comparatively modest numbers. Since the first year, this annual event has grown into one of the largest such rides here in the state of Georgia. The Outback Riders in collaboration with the Salvation Army, and Empty Stocking Fund open their hearts this time of year in expressing the true gift of giving. The generosity of all those involved benefit less fortunate children that would otherwise sadly, do without. This mutual act of kindness brings forth men, and women, from all walks of life, for miles around with one goal in mind, a Merry Christmas. So, to all of the brothers and sisters of the Outback Riders, and every one else that made this possible once again, thank you, have a very Merry Christmas, and as always… ride safe.
First Bikes top the hill


Santa

The Vstar ( I just had to put one in of my bike)